Christmas,  Crafts,  Holidays,  Holidays

Christmas Doggy Stockings

D.I.Y. adorable, easy to make, personalized doggy stockings! Step by step!

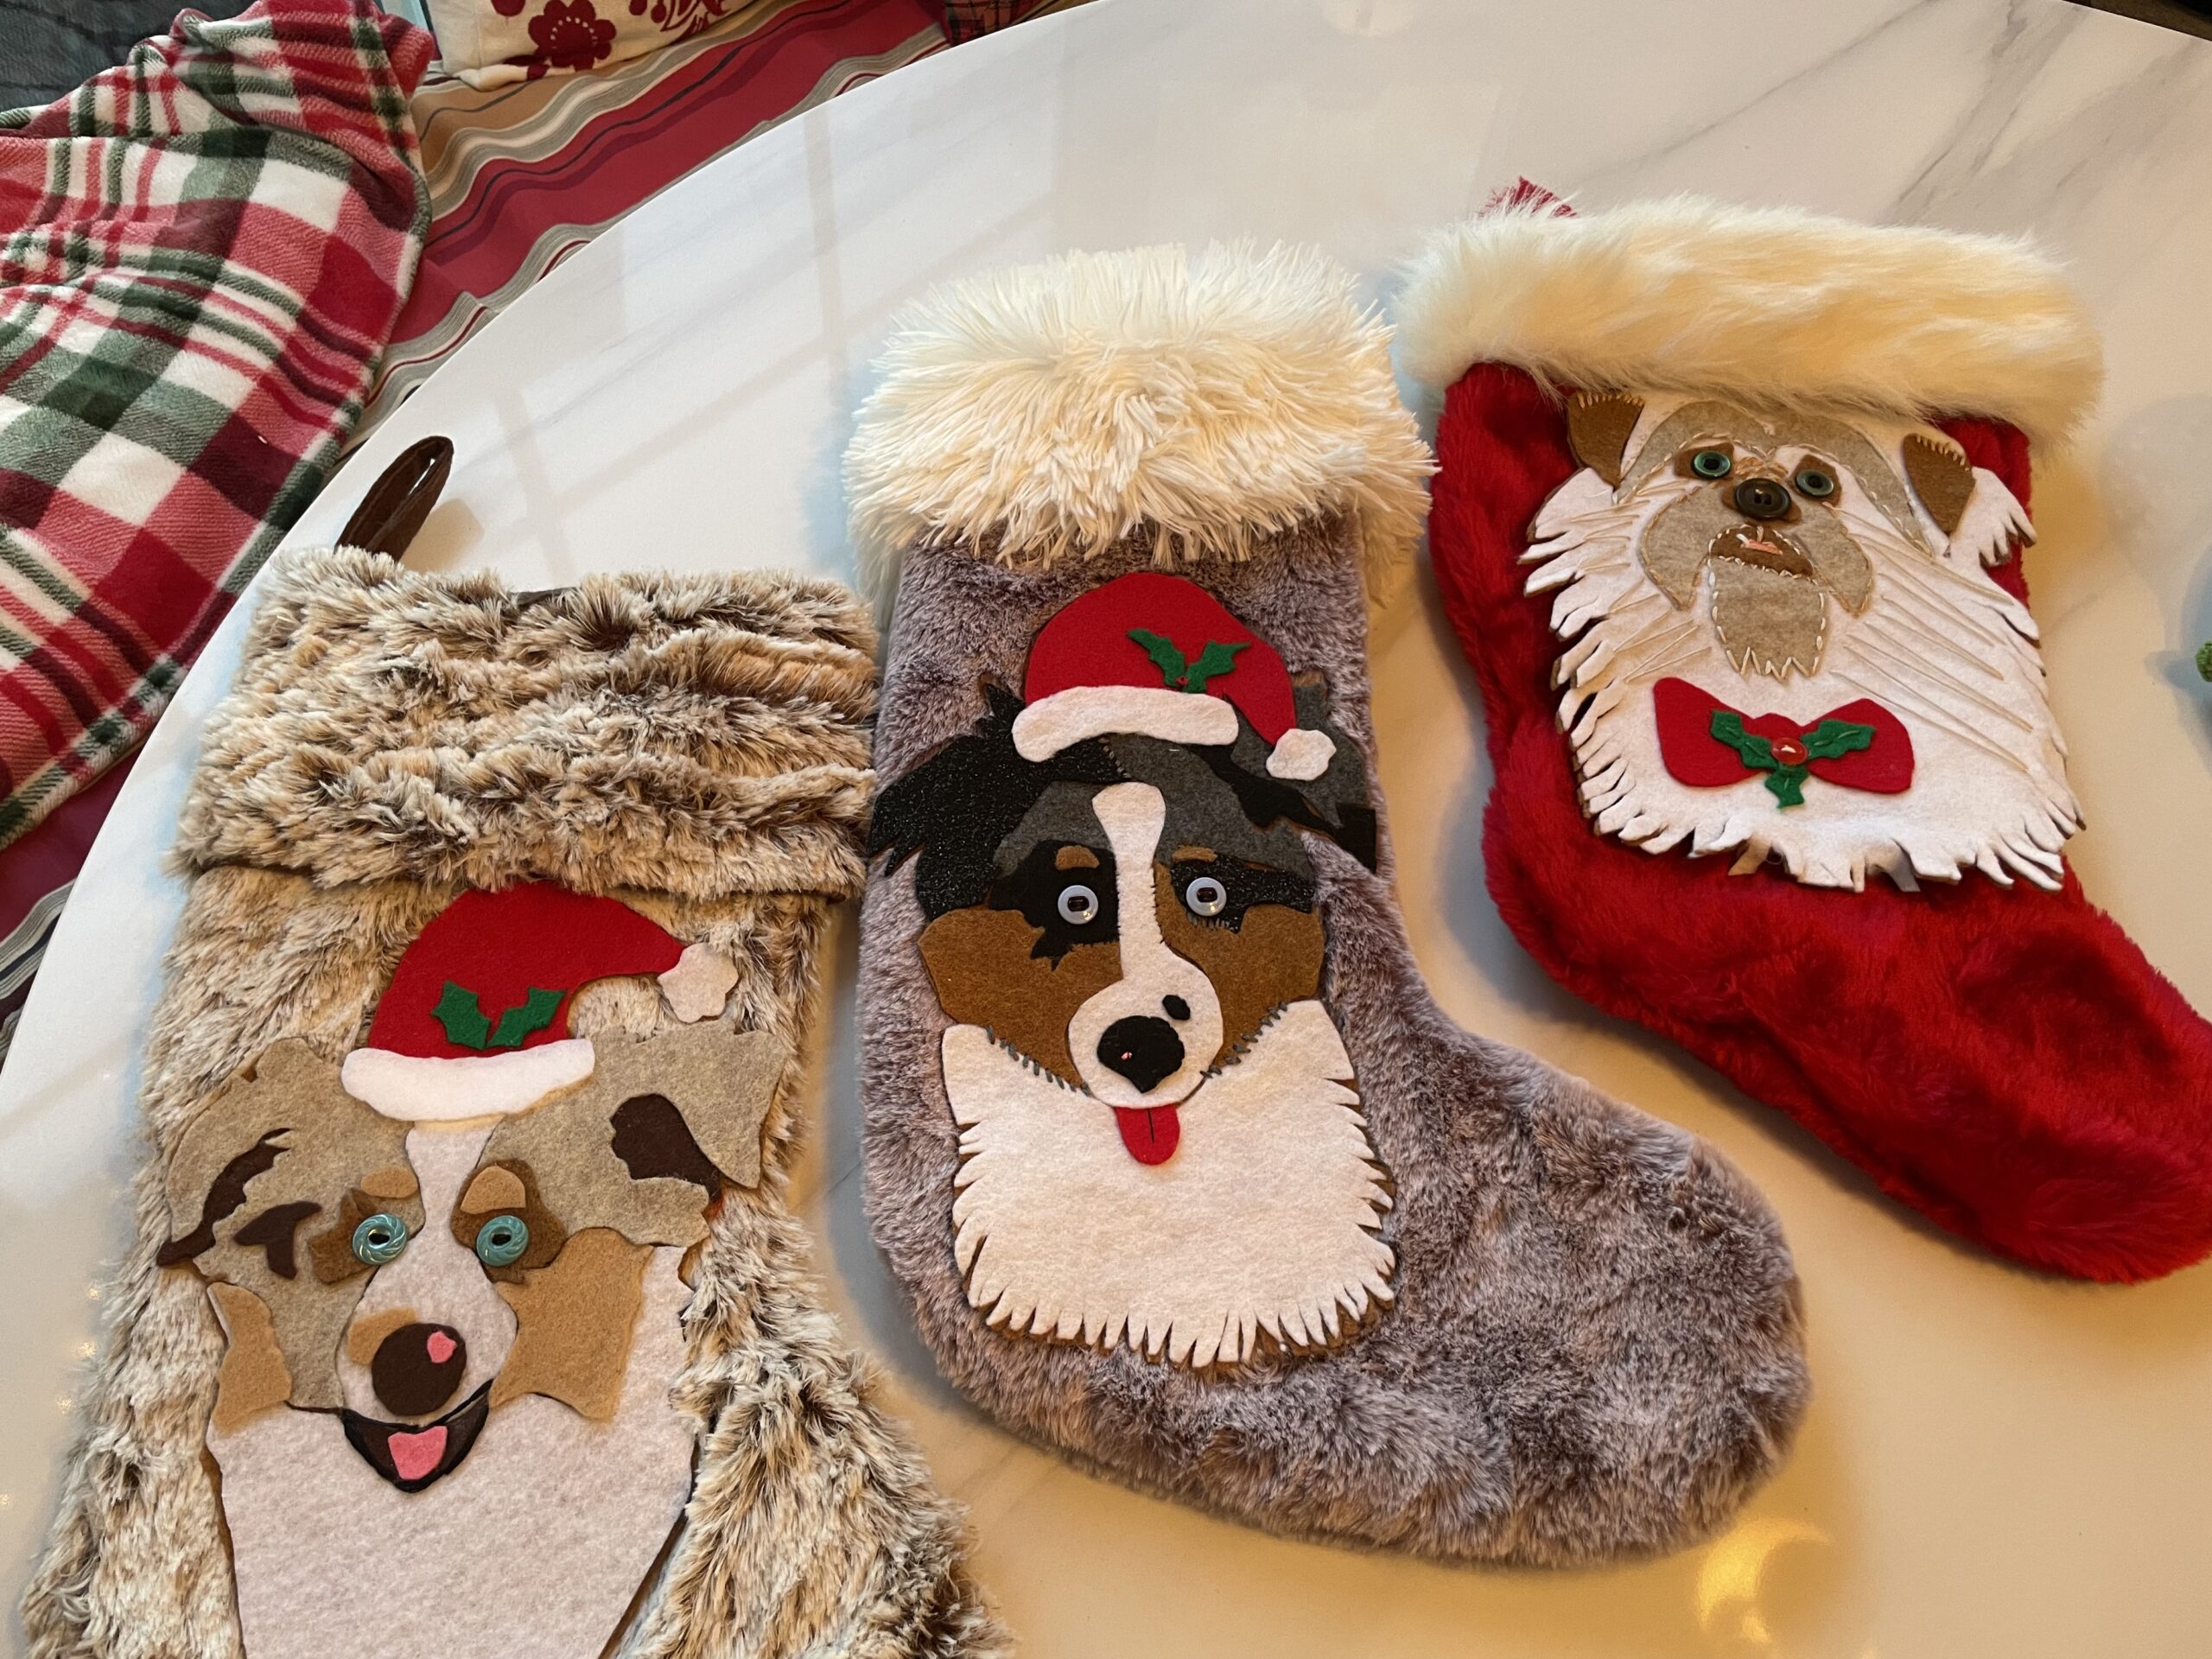
     I might be a little obsessed with my dogs, especially because my two children are grown! lol.. The pups don’t seem to mind my attention, as long as it doesn’t involve sweaters or costumes! Since I was a little girl, and got my first dog (Barney) , I have always had one or two dogs, and currently we have 3!  I am definitely  a dog person.  So at Christmas or any other holiday, I have to include them just like anyone else in the family. They get presents, birthday bones, Halloween costumes (which they don’t love, but I do! ) and of course the most wonderful time of the year and my favorite holiday they are spoiled just like  everyone else!  We currently have two Australian Shepherds, Tessie (Blue Merle) and Levi (Red Merle)  and a little mixed breed pup named Oliver, Tibetan spaniel, and not sure what else mix of lots of personality and love! A daddy’s boy! The twins, as I call them, my Aussie’s are my babies, When looking for the perfect stocking for my Tessie in 2020, I couldn’t find any that felt like it would fit her personality, I saw lots of Aussie stockings, but Aussie’s markings can vary a lot, from coloring, eye colors, and so on.. So everything I found to purchase just didn’t make me happy. So I had an idea, and I think it worked out pretty good. Below is step by step instructions on how to make a custom stocking for your pup and capture their personality and unique look.  Merry Christmas, and please if you make one, I would love for you to share it with me! 
Gather your supplies. Fuzzy stocking, felt in colors of your pup, embroidery thread, scisors , exacto knife, fabric glue ( I like Aileen's) and buttons in the color of their eyes. Cutting matt is also very useful.
1. First take your picture of you pup and print it on a standard size piece of paper.
2. Then cut out the pup's head and make sure it will fit the stocking, if it doesn't enlarge or shrink to fit, now trace this cutout onto a piece of felt to use as backing for next steps
3. Next, cut out different colored areas of your dog's face.
4. Then carefully trace your cutouts on the coordinating colored felt and cut out.
5. Re assemble your picture after cutting out each piece
6. Then assemble your colorful cutouts and glue on backing you made in step 2
When it is assembled, it's time to sew on button eyes using the embroidery thread. You can also embroider any little markings or details at this point. Now set it aside and let it dry.
After it is dry and you are happy with the way it looks, generously glue the back and stick it to your stocking, making sure to brush fur on stocking in one direction before gluing.
Now just let it dry completely on a flat surface. Whe it is dry, it is ready to hang and fill. I really love bringing these out ever year!
First one I did in 2020, of Tessie
These are so much fun, you can really get their unique features, Like her little dot on her nose
My sweet Tessie as a puppy
Levi, he is a good sport! lol.
Oliver is almost all one color, this made it difficult.
I used embroidery thread to try and make his long fur.
All done, ready for Santa to fill.
Oliver loves it! They really get excited every year for their stockings.

Leave a Reply

Your email address will not be published. Required fields are marked *